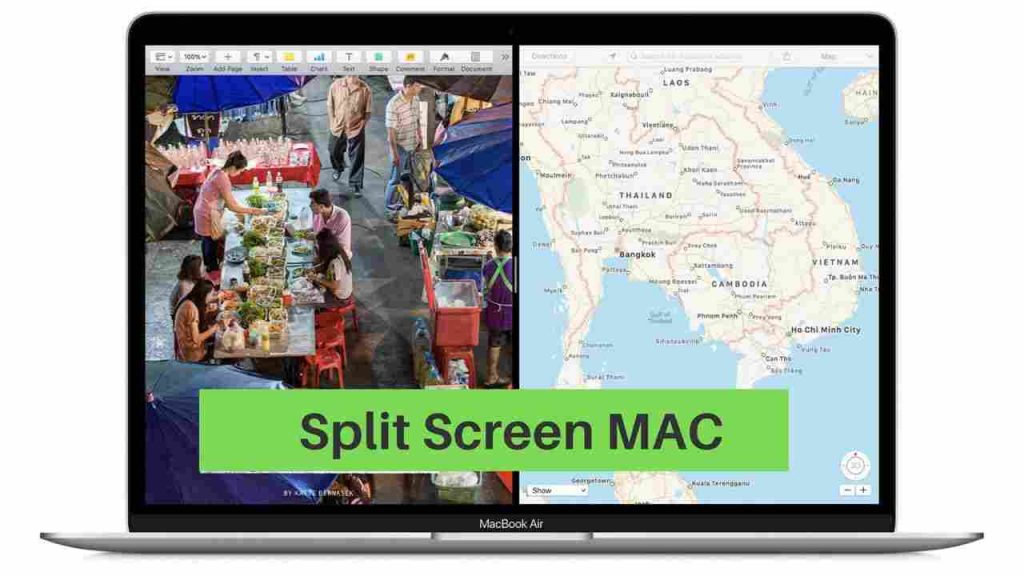
The split-screen or the ‘Split View’ feature on your MacBook can be used to view and work on two apps at the same time without having to go through the hassle of resizing and moving the app windows manually. This feature is relatively new as it is only available on the more recent versions of macOS, i.e., macOS X El Capitan, macOS Catalina, macOS Mojave, macOS High Sierra, and the latest version, macOS Sierra.
The steps to enter Split View mode also vary between the different macOS versions. Keep reading ahead to find out more.
How to use Split View mode on macOS Catalina?
- Hover your mouse over the fullscreen button on the top left corner of the window. Alternatively, click and hold down the fullscreen button.
- Next, select “Tile Window to Left of Screen” or “Tile Window to Right of Screen” from the menu. This will make the window move over to the left side or right side of the screen, respectively.
- Open another window on the other side.
- You can now use it on the other side of the screen alongside the first one.
How to use Split View mode on other macOS versions?
- First, click and hold down the fullscreen button on the top-left side of your screen.
- While you are holding down the fullscreen button, you will notice the window shrink. Once this happens, you can drag and move the window to the left or right side of your screen, according to your preference.
- Once you have brought your window to the desired side, release the fullscreen button.
- Next, open another window on the other side of the screen.
- You can use both windows at the same time.
What to do if these steps do not work?
If you find that both the above methods are not able to enter Split View mode, then try the following additional steps.
- First, choose the Apple menu and select System Preferences.
- Then, click Mission Control, and check the box for the “Displays have separate Spaces” option if it is not selected.
How to work in Split View mode?
The Split View is great for working on two apps at the same time. With this feature, you can
- Select a window by clicking any part of that window.
- View the menu bar by hovering over the top of the screen.
- Interchange the window positions by dragging them to the opposite side.
- Adjust the width of the window by adjusting (holding down and dragging) the vertical side of the window.
You may like these MAC posts too:
1. How to Take Screenshot on MAC 10.15 and previous
2. How to Right Click on Mac
3. Ways to Copy Paste in MAC PC
4. 3 Ways to Record Your MAC Screen with Audio
5. Force Quit Mac Programs/Apps instantly
How to exit Split View mode?
To exit the Split View mode, follow the steps given below.
- Hover your mouse pointer over the top of the screen, so that window buttons appear for the left and right windows.
- Now click on the fullscreen button again. This will close that window whose fullscreen button you clicked, and the other window automatically switches back to fullscreen mode.
- You can also switch to full-screen mode by using the Mission Control option or by using a Multi-touch gesture by swiping left or right using three or four fingers on the trackpad.
Overall, the Split View feature is an excellent addition to the latest versions of macOS for viewing and using two apps side by side on the screen, especially for people who use their MacBooks for work. It saves a lot of time and frees the user from a lot of hassle and going back and forth. Multitasking has just become easy!


![Read more about the article How to Clear Cache on iPhone [5 Cache cleaner Apps]](../https@610698-1978843-raikfcquaxqncofqfm.stackpathdns.com/wp-content/uploads/2019/12/Clear-cache-on-iPhone-300x169.jpg)
