Epost100’s Quick Answer:
To Turn On AirDrop on iPhone:
1. Swipe down or swipe from right to go to the control center.
2. Press and hold Bluetooth option.
3. Now click on the Airdrop icon to turn it ON.
To Turn On AirDrop on Mac:
1. Open Finder Menu
2. Choose Airdrop on the sidebar.
3. Click Allow me to be discovered.
To get more detailed answer read below-
If you are a part of the Apple Ecosystem, you know how easy it to send and receive files using Airdrop. It’s so fast and effective way to transfer files between devices via Bluetooth. Obviously you’ll have to learn how to turn airdrop ON to make the best use of it.
If you are an Android user, you would have probably used ShareIT or other third-party apps, It’s a way to transfer files between android devices and even iOS devices. But it requires you to install the app on your phone. So, if both the devices don’t have the app, it’s going to be painful to transfer files between android devices. Apple has taken a lot of care in designing the Airdrop process to make it as easy as possible years back, to share files without using any other app. But Google just now came up with Nearby Share for Android, a functionality just like Airdrop, which is still in beta.
So, let’s learn how to turn on Airdrop in both iOS & macOS devices in this post.
How to Turn on AirDrop on iPhone (iOS)?
You can follow these steps on any of your iPhone 11, X, 8, 7, 6 to turn your Airdrop On and connect with other Apple devices.
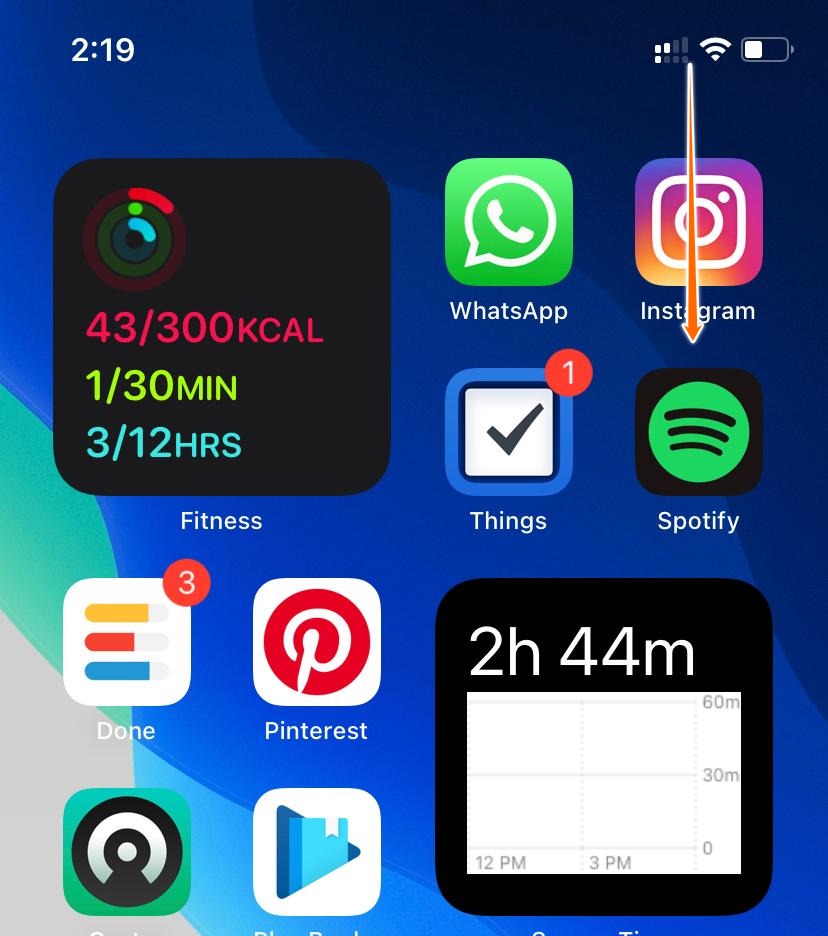
- From the home screen or anywhere else, Swipe down at the top right corner to open the control center. Please be noted that this is how you would open the control center on iPhone X or later, where you see iPhone battery percentage. For earlier devices, you have to swipe from below.
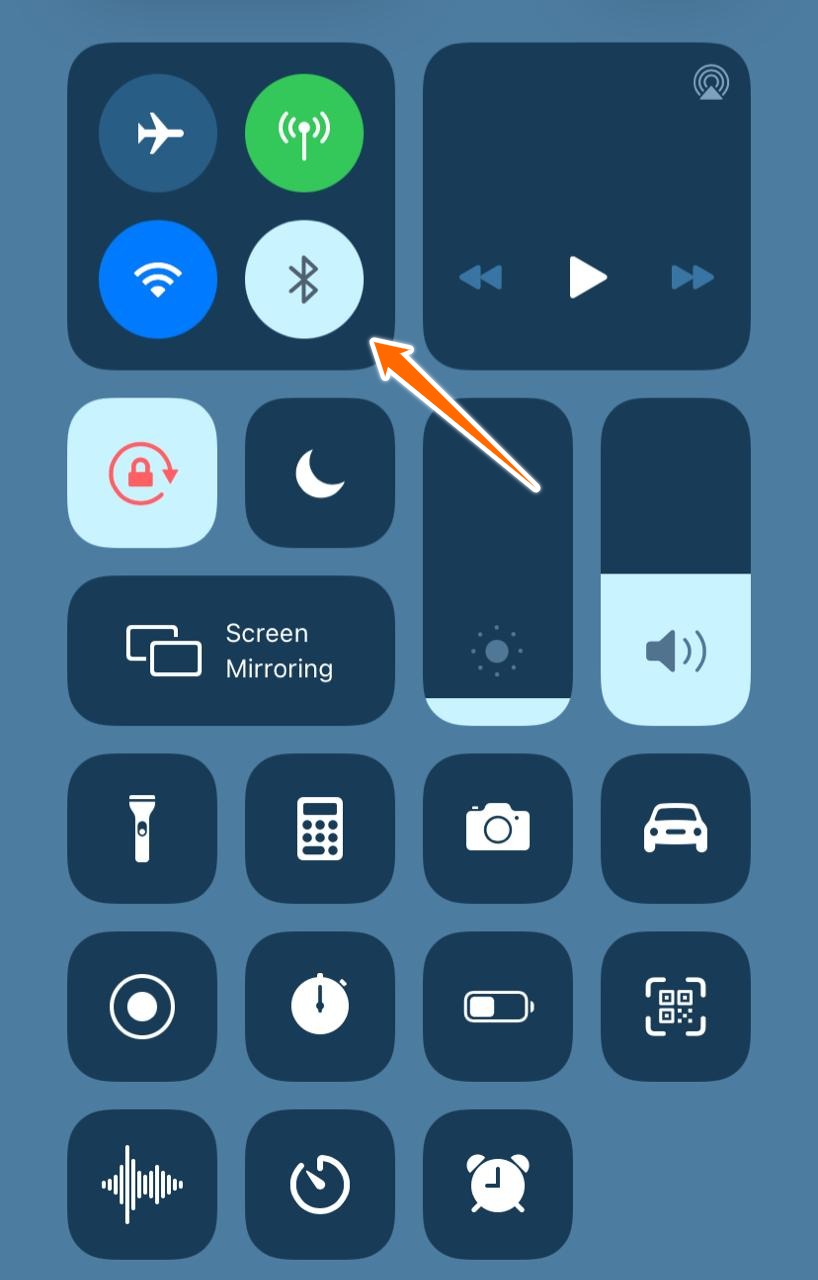
- As soon as you see the control center, press, and hold the Bluetooth option as pointed out below. This will open the Bluetooth subsection.
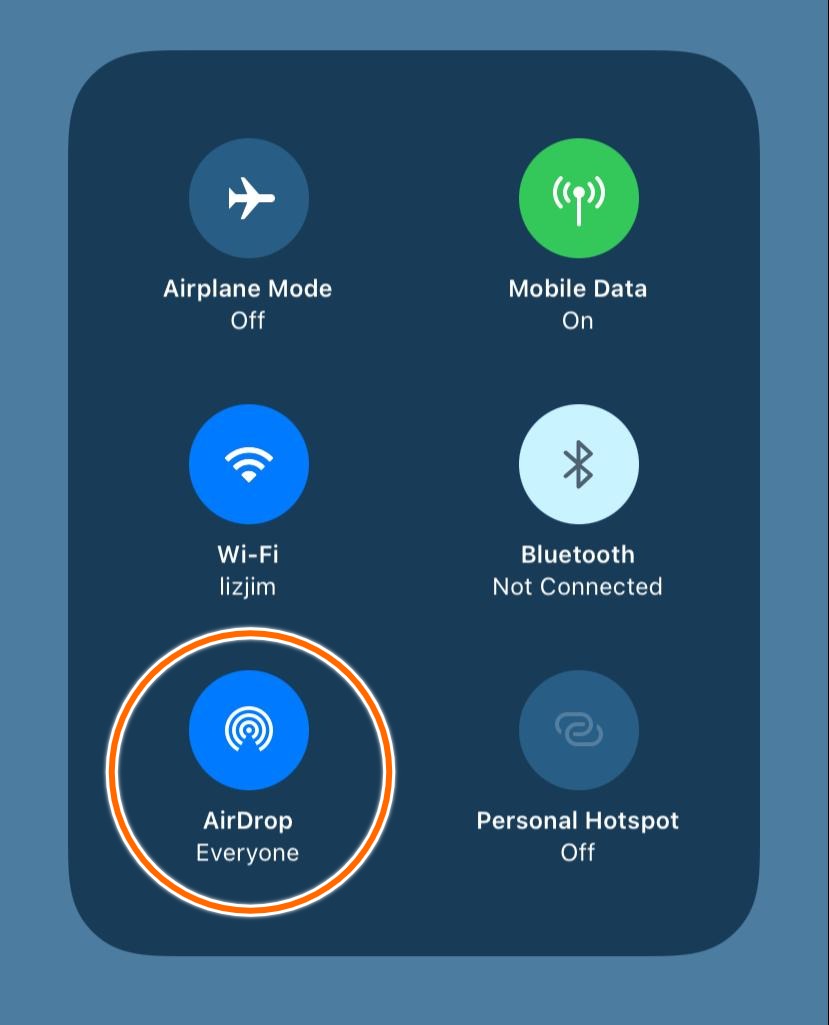
- In the options panel that appears, again Press & Hold the Airdrop Option. This will open another options section.
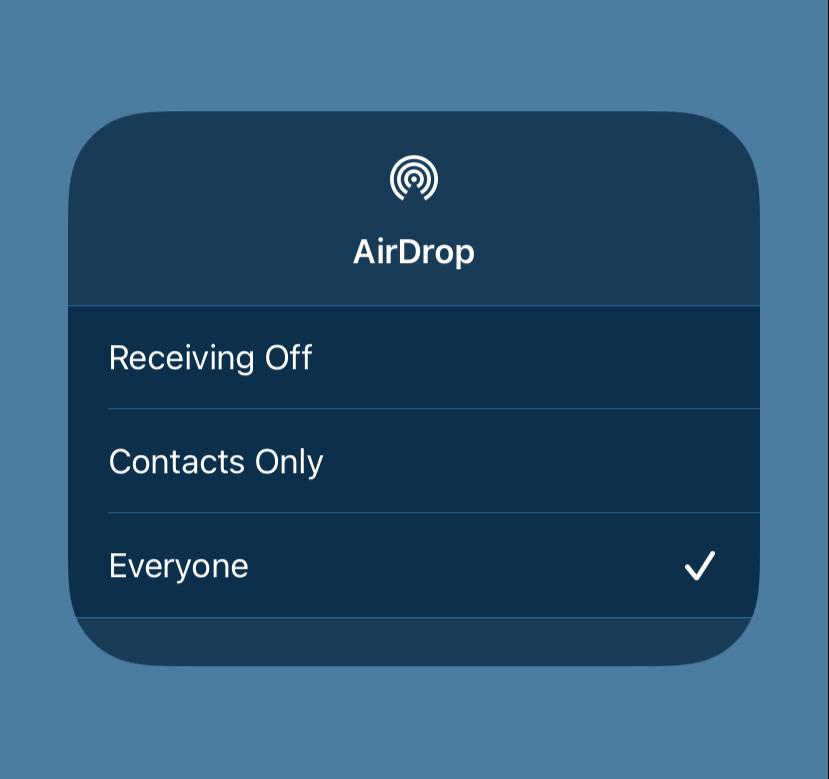
- As you can see, there are three options for Airdrop.
- Receiving off means you are actively choosing to not receiving any files from anyone.
- Contacts only mean you don’t want any strangers to send you files.
- Everyone means anyone with an iOS or macOS device can send you files via Airdrop.
Choose the necessary option that works for you. I have had Everyone turned on for years now and I have not personally faced any issues. Going further into settings, you can choose the device you want to connect, Change AirDrop Name, and more
Bonus: How to share Wi-Fi Password from iPhone to Android
How to Turn on AirDrop in macOS?
The steps to enable Airdrop is pretty similar in macOS, you can try these on your Macbook and Mac PC.
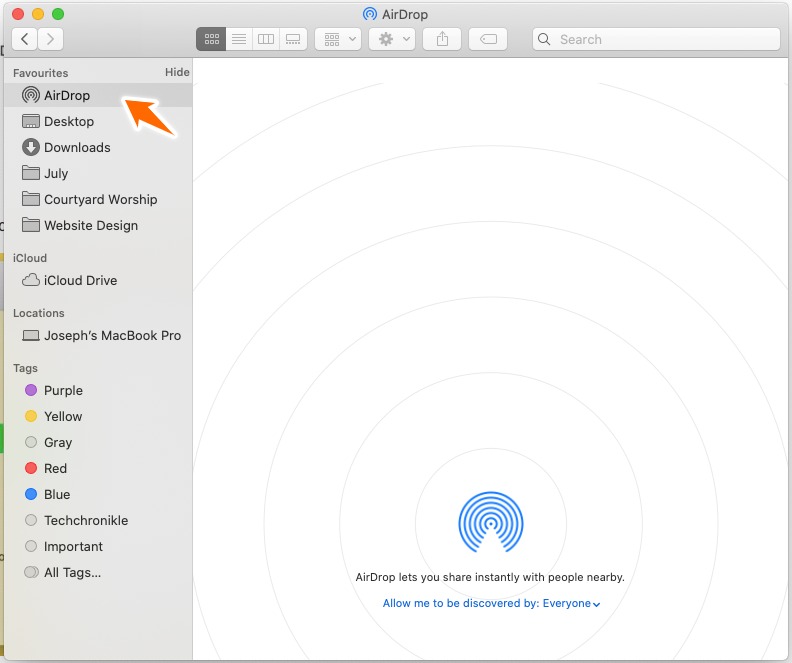
- Open Finder Menu.
- Choose Airdrop on the sidebar as seen above. If Airdrop is not available on the sidebar. Press Command + Spacebar and type Airdrop in the Spotlight. You can open Airdrop from there.
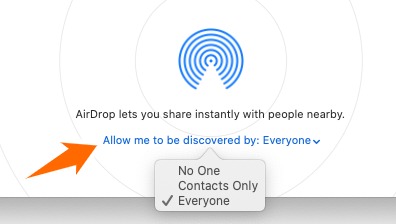
- Click on the Allow me to be discovered by option in Airdrop. In the popup menu that appears choose the relevant option that works for you.
- Choosing the right option either Contacts Only or Everyone will keep your airdrop and you can send and receive files from other iOS & macOS devices smoothly without any glitch.
Also, you can keep it turned ON even after sending or receiving files. I haven’t faced any harm in keeping it ON for years.
More Posts on Apple Tips:


![Read more about the article Quick Fix – AirDrop Not Working on iPhone or Mac [8 Ways]](../https@610698-1978843-raikfcquaxqncofqfm.stackpathdns.com/wp-content/uploads/2020/07/How-to-fix-AirDrop-not-working-300x169.jpg)
![Read more about the article How To Reset iPad with and without Passcode [Updated]](../https@610698-1978843-raikfcquaxqncofqfm.stackpathdns.com/wp-content/uploads/2020/08/reset-ipad-300x169.jpg)
